

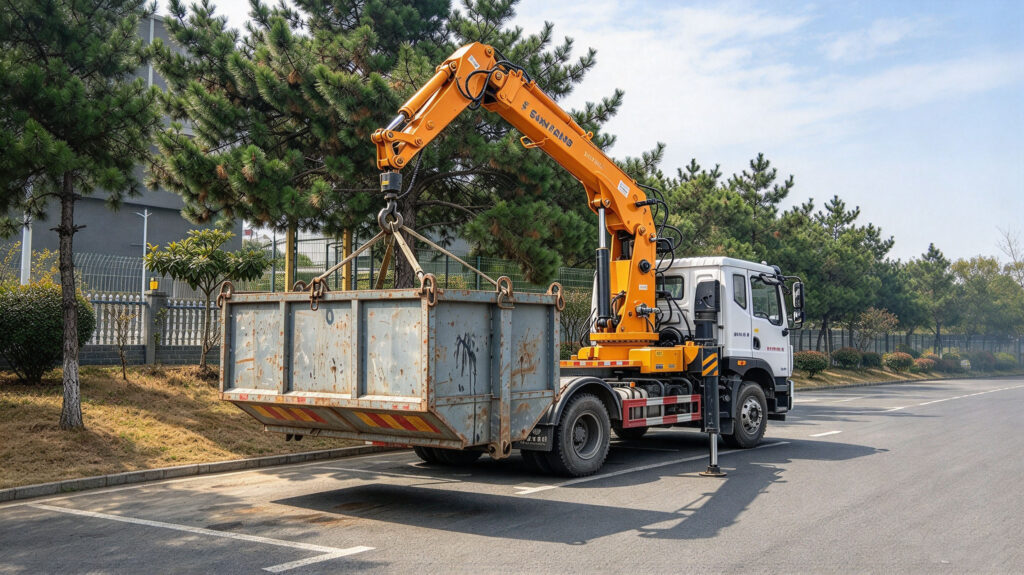
Skip loader capacity classes and arm structure
A skip loader garbage truck earns its keep by picking up and setting down skip bins without a second vehicle. The two decisions that decide whether it fits your routes are the bin capacity class and the arm structure that does the lifting. Get either wrong and you either overload the arm or pay for capacity you never use. This guide breaks both down so the specification matches the work.
What a skip loader actually is
The skip loader is built around a rear-mounted swing arm and a pair of hoist chains or a hydraulic cradle. The arm reaches back, latches the skip, and pulls it up and over onto the truck bed, then reverses the motion to set it down at the next site. It is the workhorse for construction debris, bulky waste, and any route where bins are too heavy to tip by hand but too few to justify a full rear compactor. Compared with a hook-lift, it handles loose skips rather than locked containers; compared with a rear compactor, it trades compaction for simple, fast bin exchange.
Capacity classes and how they map to duty
Capacity is usually stated in cubic metres of skip volume, and it tracks closely with how heavy a skip the arm must lift. The classes below cover most municipal and contractor fleets, and each one tends to suit a different kind of route.
Mini, 2-4 cbm. A narrow chassis for historic centres and tight alleys, lifting light, frequent skips on household and light-commercial rounds. Mid, 6-8 cbm. The general-purpose class for mixed municipal waste where bins are collected often but never overloaded. 8-10 cbm. The sweet spot for denser commercial and construction loads, where a skip fills by weight before it fills by volume. Heavy, 12-14 cbm. Built for demolition and bulky waste, where skip weight climbs fast and the arm rating has to keep pace. Extra-heavy, 16 cbm. Maximum skip volume on a rigid chassis, with a reinforced arm and a heavy gross vehicle weight to carry it.
| Capacity class | Skip volume (cbm) | Best-fit duty | Arm lift needed |
|---|---|---|---|
| Mini | 2 – 4 | Narrow streets, light waste | ~1.5 t |
| Mid | 6 – 8 | General municipal | ~2.5 t |
| 8-10 | 8 – 10 | Commercial & construction | ~3.2 t |
| Heavy | 12 – 14 | Demolition, bulky | ~5.0 t |
| Extra-heavy | 16 | Maximum volume rigid | ~7.0 t |
Arm structure: the part that does the work
The arm is where skip-loader design diverges. A single swing arm is simple and cheap but puts twist load on one side; twin arms spread the load and suit heavier skips. The pivot geometry, the hydraulic cylinder mounting, and the knuckle reinforcement decide how many lift cycles the structure survives before fatigue shows. A poorly braced single arm on a heavy skip will develop cracks at the pivot long before the hydraulics complain.
Material choice matters as much as shape. High-strength low-alloy steel lets the arm stay lighter while carrying the same load, which protects the chassis from unnecessary stress and improves payload. Look for continuous weld seams at the pivot and a cylinder that is shielded from falling debris during loading, because a struck cylinder is the fastest route to a roadside failure.
Arm geometry in detail
The pivot point sets the leverage. Mount it too far back and the cylinder works harder on every lift; mount it too far forward and the skip swings awkwardly over the cab. The knuckle – the joint where the arm meets the hoist bar – is the highest-stress point, and a reinforced, properly gusseted knuckle is what lets a heavy-class arm repeat its cycle thousands of times. Twin-arm designs add a second pivot and a cross-member that cancels the twist a single arm would otherwise pass into the chassis frame.
What to confirm before you specify
- The rated arm lift matches the fully loaded skip weight for your heaviest route, not the empty bin.
- The arm type (single or twin) matches your duty; twins earn their cost above roughly 3 tonnes.
- The pivot and knuckle use continuous welds with visible penetration and gussets.
- The hydraulic cylinder is guarded and serviceable from the ground.
- The chassis gross vehicle weight leaves margin after bin, arm, and body weight are summed.
- The hoist bar and latch are sized for your specific skip type, not just a generic bin.
Maintenance that keeps the arm alive
The arm lives or dies on lubrication and inspection. Grease the pivots on a fixed schedule, because a dry pivot wears into slop that then loads the welds. Inspect the weld seams at the knuckle every few hundred cycles for hairline cracks, especially on single-arm heavy-class units. Keep the cylinder rod clean and the guards intact, and train drivers to seat the skip squarely – a skewed latch is a small error that becomes a bent arm over a season.
Matching the class to your routes
A route profile, not a catalogue, should decide the class. If your skips are light and frequent, a mini or mid unit keeps the chassis small and the maneuverability high. If you handle trade waste where skips fill with rubble, step up to the 8-10 or heavy class so the arm rating covers the worst day, not the average one. Buying to the average load is how arms get overloaded; buying to the peak load is how the truck lasts.
How skip loaders compare to the alternatives
Against a hook-lift, the skip loader wins on fast bin exchange and lower cost but loses on secure container transport. Against a rear compactor, it wins on simplicity and bin variety but loses on volume reduction, so it suits bulky and construction waste more than dense household streams. Knowing which job you actually have prevents paying for a compactor you do not need or under-specifying an arm that fails.
How lift capacity scales with class
Rated arm lift climbs steeply with capacity class because a bigger skip holds far more dense material. The chart shows typical rated lift values; the extra-heavy class more than quadruples the mini class, and the chassis behind it grows to carry both.
Figure 1. Typical rated arm lift by skip-loader capacity class.
The same figures in copyable form:
| Capacity class | Rated arm lift (kg) | Typical chassis GVW (t) |
|---|---|---|
| Mini 2-4 cbm | 1500 | 3.5 – 5 |
| Mid 6-8 cbm | 2500 | 7 – 10 |
| 8-10 cbm | 3200 | 10 – 12 |
| Heavy 12-14 cbm | 5000 | 14 – 18 |
| Extra-heavy 16 cbm | 7000 | 18 – 25 |
Common failure modes to watch
Even a well-specified arm fails in predictable ways once it is working. Pivot wear from missed lubrication is the quiet one, slowly turning tight geometry into sloppy, arm-wobbling play. Weld cracks at the knuckle are the serious one, usually traced back to an overload or a skew-seated skip rather than a manufacturing defect. Cylinder rod damage from unguarded loading is the avoidable one, and a leaking assist is the early warning that the seal is going. None of these are mysterious; they are the direct result of the maintenance and seating habits covered above, which is why those habits pay for themselves many times over.
Frequently asked questions
Single arm or twin arm – which should I choose?For routes under about 3 tonnes of loaded skip weight, a single arm is fine and cheaper. Above that, twins spread the load, reduce twist on the chassis, and last longer under heavy daily cycles.
Does a bigger skip always mean a stronger arm?
It should, but confirm the rated lift on the order. Some builders fit a large bin on a lighter arm; the number that matters is the rated lift versus your heaviest loaded skip.
What steel should the arm use?
High-strength low-alloy steel is the standard for a good reason: same load, less weight, less chassis stress. Ask the builder to name the grade rather than accepting high strength as a vague answer.
How do I avoid overloading the arm in the field?
Specify the arm by the heaviest loaded skip on your routes, train drivers to seat the skip correctly, and keep the hydraulic cylinder guarded against impact during loading.
Is an 8-10 cbm unit enough for construction debris?
Often yes for general trades, but dense demolition waste fills a skip by weight long before it fills by volume. If you handle rubble, lean toward the heavy 12-14 cbm class with a 5 t arm.
How often should I inspect the arm welds?
Check the knuckle and pivot seams every few hundred cycles for hairline cracks, and always after a suspected overload or a skew-seated lift. Early cracks are cheap; a failed arm is not.