

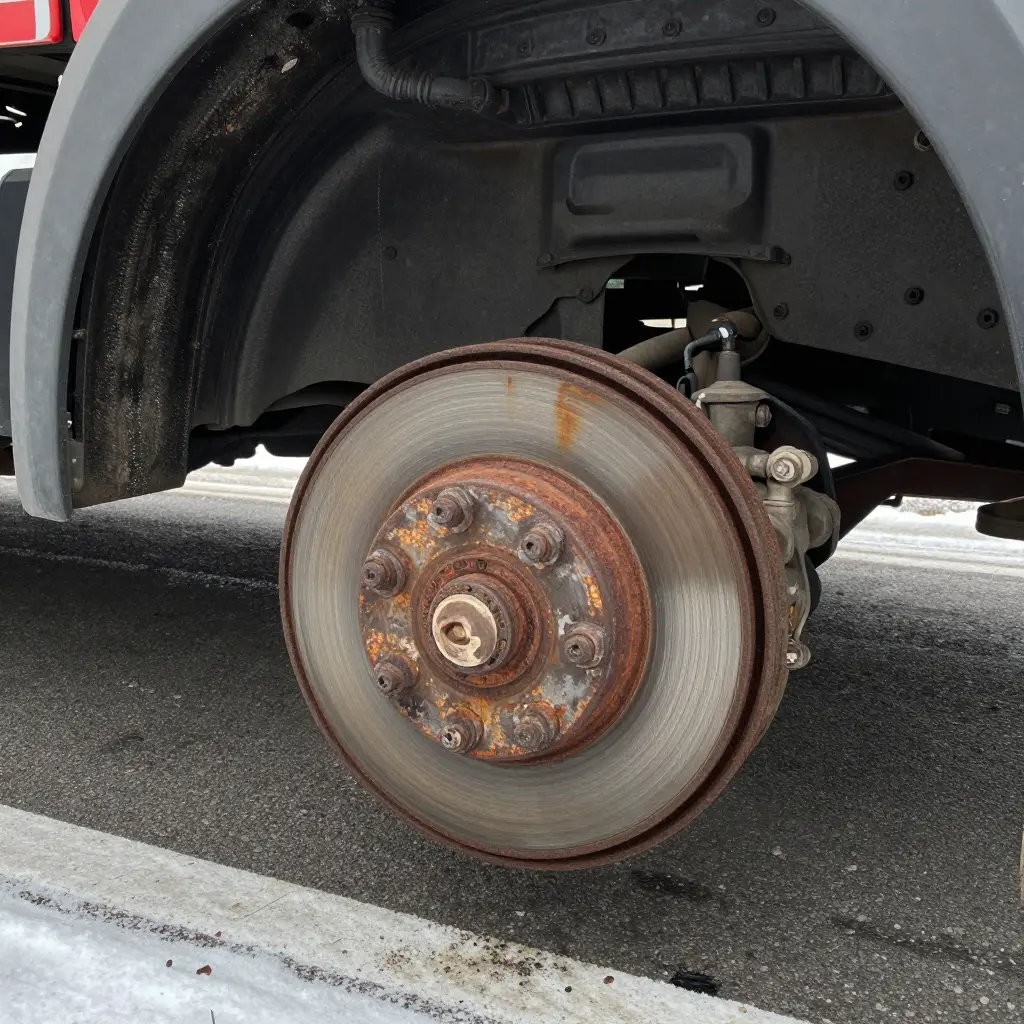
Why Brake Chamber Corrosion, Not Mileage, Decides Winter Inspection Outcomes
A truck can run 6,000 miles in a winter and still be put out of service at the first checkpoint in January. What fails in cold weather is usually not a part that worked through its mileage allowance. It is a steel housing that has been wet, salty and cold since the first brine run.
Mileage records distance traveled. It does not record how many times the air system took on moisture, or how many nights the chamber housing sat under a film of chloride. Those are the things the inside of a chamber responds to.
Short-haul duty makes it worse. Cold starts, partial warm-ups and stop-and-go delivery keep the compressor cycling without ever getting the system hot enough to dry itself out, so condensate stays where the return spring and diaphragm sit. Road salt works the same parts from outside. Spray collects on housings, clamp bands and pushrods, and once the coating fails, pitting starts at seams and breather ports, where water has nowhere to drain.
By the time corrosion reaches the diaphragm and spring, the chamber no longer holds or releases pressure predictably. Slow leaks, a pushrod that sticks, uneven application: these are the defects a roadside inspection is built to catch. Winter maintenance on John trucks should therefore treat the air system as a moisture problem first and a wear-part schedule second.
Anatomy First: Why a Brake Chamber Is Built to Move, and Where It Rusts
A brake chamber turns air pressure into mechanical force, hundreds of times a shift, in rain, spray and brine. How it is put together explains why brake chamber corrosion gets these units condemned while the friction material is still half worn.
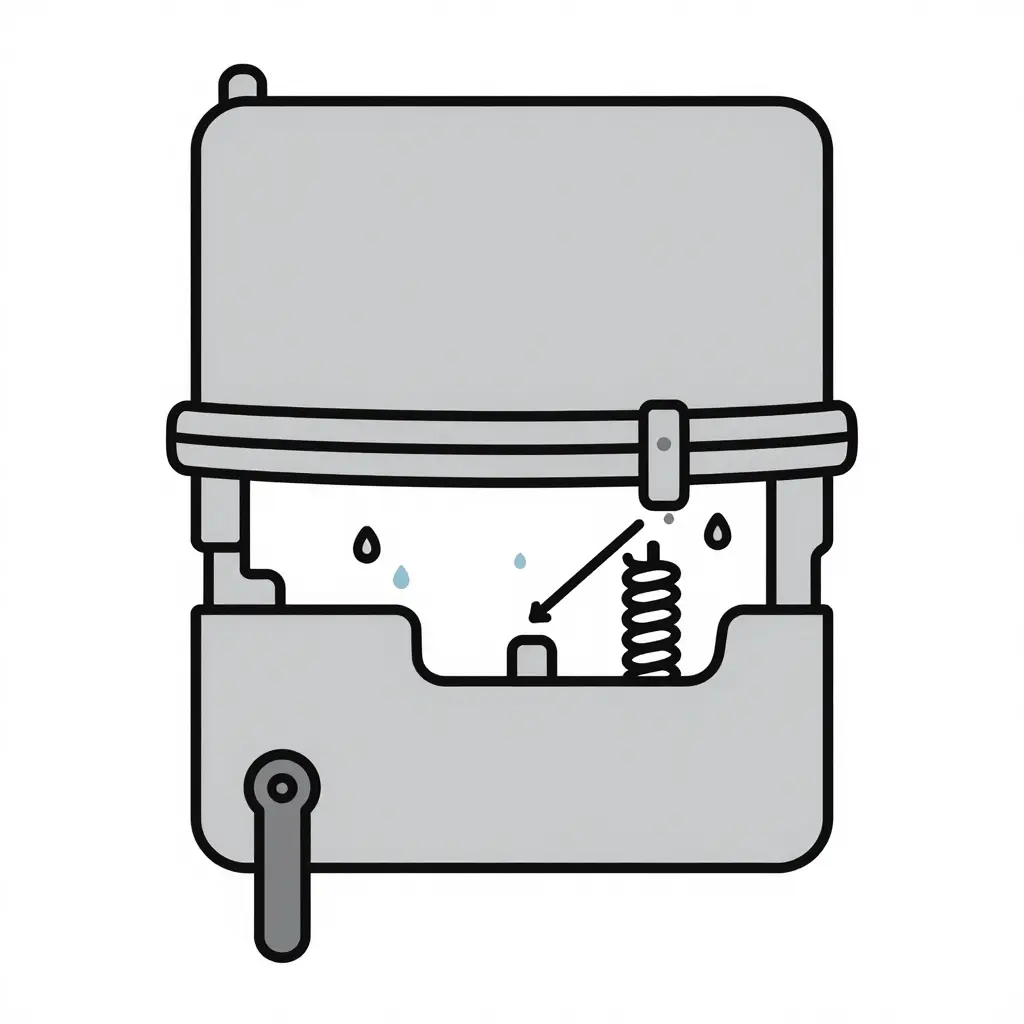
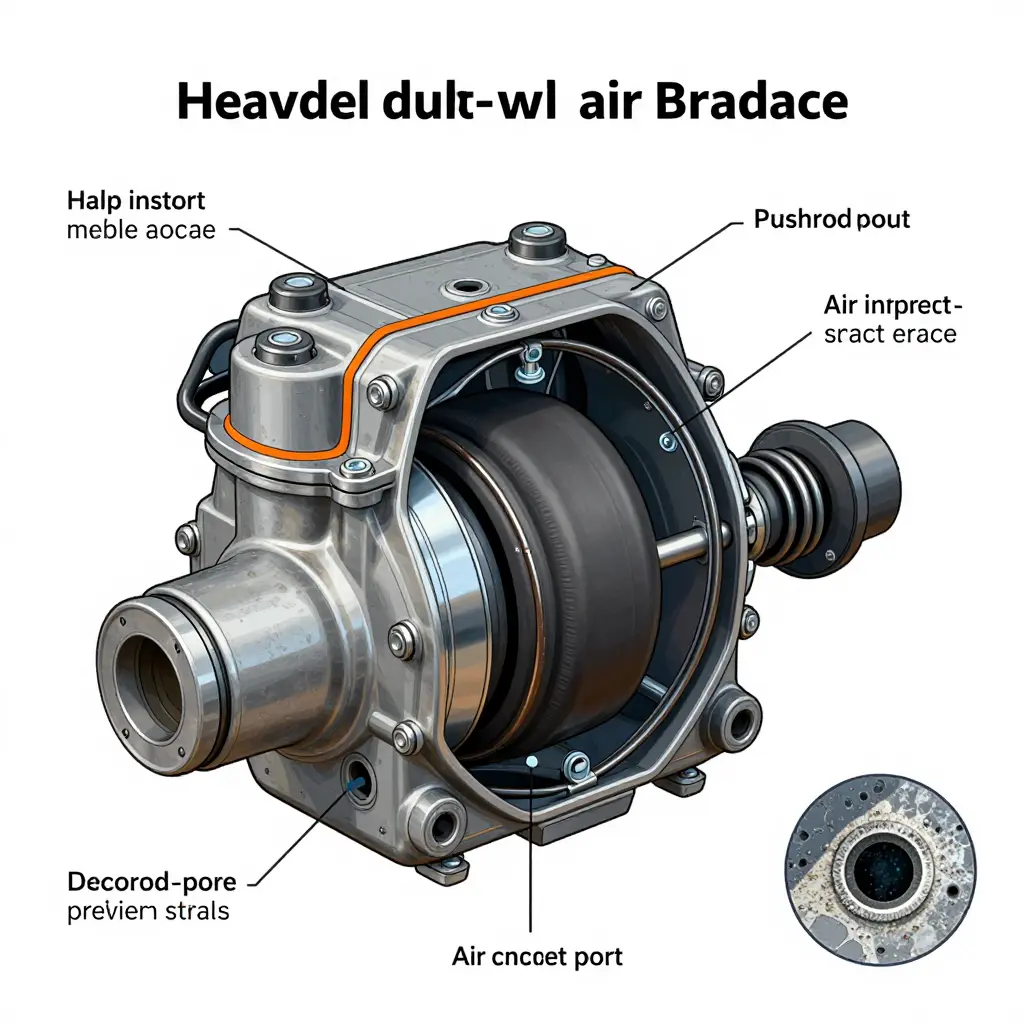
Schematic cross-section: the arrowed path traces where winter moisture and condensation enter and settle inside the chamber, pooling at the diaphragm flange and spring cavity.
The Housing: Two Steel Halves Under Pressure
Two stamped steel housings are held together by a clamp band. One half is pressurized to apply the brake. The other holds the return spring, or on a spring-brake unit the parking spring, which air pressure compresses to release the brake and which applies it again once that air is exhausted. Internal surfaces are bare or lightly coated steel, so every one of them starts oxidizing as soon as water is present.
The Diaphragm: The Working Element
A reinforced rubber diaphragm is trapped between the two housings. Pressure flexes it and the pushrod carries the movement out to the slack adjuster. The same rubber also keeps water out of the pushrod bore, so a diaphragm that hardens or cracks becomes a corrosion problem as well as a pressure problem.
The Pushrod, Return Spring and Clamp Band
The pushrod runs through a bore in the housing. The return spring pulls the diaphragm back when pressure is released. The clamp band compresses the diaphragm against its sealing beads, which makes band tension a sealing function as much as a structural one: a band that has lost torque or rusted thin leaks at the seam before anything else fails.
Breather Openings: Necessary, and Deliberately Open
The spring side has to breathe as the diaphragm moves, so the vents are open to atmosphere by design. That is unavoidable, and it also means humid air, splash water and salt mist have a standing invitation into the cavity.
The Moisture Pathway: Compressed Air Cools and Condenses
Compressed air leaves the compressor hot and saturated. By the time it has traveled through the lines into a cold chamber it has cooled, and cooler air cannot hold the same amount of vapor, so the excess comes out as liquid on the housing wall and the spring.
Freeze-thaw makes a daily cycle of it. The housing warms during the day and draws moist air in through the breather; overnight it drops below the dew point and water condenses on cold steel; the thaw leaves that water lying against bare metal. Road spray and salt mist enter through the same vents on the spring side, so the chamber is being attacked from inside and out at once.
The Corrosion Progression, Stage by Stage
Corrosion inside a chamber follows a fairly predictable sequence, and each stage leaves a symptom a technician can measure or feel. That is what makes winter brake maintenance a diagnostic job rather than a cosmetic one.
| Stage | What Happens Physically | Measurable Brake Effect |
|---|---|---|
| 1. Surface oxidation | Flash rust on housing walls, spring coils and pushrod | None yet; rust film only |
| 2. Pitting | Localized pitting in the pushrod bore and on spring seats | Bore friction rises, so release slows and stroke readings drift |
| 3. Diaphragm degradation | Rubber hardens and cracks at the bead, where salt collects | Pressure loss, leakage at the clamp band, uneven application |
| 4. Pushrod seizure | Rust and ice bind the pushrod in its bore | Rod fails to return; brake drag and heat at the wheel |
The stages matter because the symptoms do not look like corrosion from the driver’s seat. A pushrod binding in a pitted bore releases late and leaves the brake dragging, which shows up as heat and a pull rather than as a stroke problem. A diaphragm hardened at the bead leaks, and the compressor runs all day replacing air it should not have to make up. A seized pushrod can hold a brake partly applied until the lining is cooked.
Why the Chamber Wins the Inspection Argument
Mileage tells you how much a truck has worked. It does not tell you how many freeze-thaw cycles a chamber has been through with water sitting inside it, which is why brake chamber corrosion is where a winter inspection on a low-mileage truck usually starts. Check the chamber before you check the adjustment. If your fleet pulls trailers, give trailer air brake systems the same attention: trailer chambers sit longer between inspections and collect more condensate.
Drain the tanks, confirm the air dryer is working, and get the chambers off and inspected before the season turns. The rubber and steel inside will tell you whether the air brake system is ready for the cold.
Brake Chamber Corrosion Warning Signs to Log During Winter Pre-Trip Checks
Brake chamber corrosion rarely shows up as one dramatic failure. It shows up as a handful of small, measurable defects that a technician can write down before they turn into a breakdown, including on the trailer brake and running gear assemblies that see the heaviest road-salt exposure.
- Rust bloom along the clamp band seam, visible as orange-brown staining where the band seats against the housing.
- A diaphragm that is cracked, hardened or oil-contaminated. On a clamp-band serviceable chamber, split it per the OEM procedure and inspect the rubber; on a sealed, crimped unit, replace the chamber instead of opening it.
- Pushrod stroke beyond the OEM adjustment limit, measured with a rule at the slack adjuster after a full brake application.
- Slow or incomplete release, timed with a stopwatch on pushrod return after the treadle is released.
- Air leakage at the chamber seam, clamp band or inlet fitting, found by sound and confirmed with soap solution during a static leak-down test.
- Corroded or seized mounting hardware and bracket bolts, checked by torque wrench and visually for scaling and thread loss.
- Free water or emulsion in the air system, drained from reservoir drain cocks and the compressor discharge during the daily blow-down.
Some of these are out-of-service defects on their own: a stroke past the adjustment limit, a chamber that leaks, a missing clamp band bolt. Others, like light rust bloom at a seam, are findings to log and watch. Writing them down early is how you avoid meeting them again on the shoulder, where a failed clamp band or an over-stroke pushrod ends the trip.
Treat the list as a scorecard rather than a glance, and put a measurement next to each finding so trends across the fleet become visible.
Winter-Specific Factors That Accelerate Brake Chamber Corrosion
Winter does not just make a brake system cold. It changes the chemistry around it. Road salt corrosion dominates the season because chloride spray coats the chamber exterior and holds moisture against the housing and band at temperatures where plain water would have dried off. That brine film wicks past the clamp-band joint, the pushrod boot and the breather into the cavity, where it attacks spring coils, diaphragm seating surfaces and stroke-limiting hardware. The result is pitting that thins the housing, a band that no longer seals, and a chamber that slowly loses the ability to return a compliant stroke. Units that work the same streets as the brine trucks see the most of it, since treated pavement stays chemically active for days after a storm.
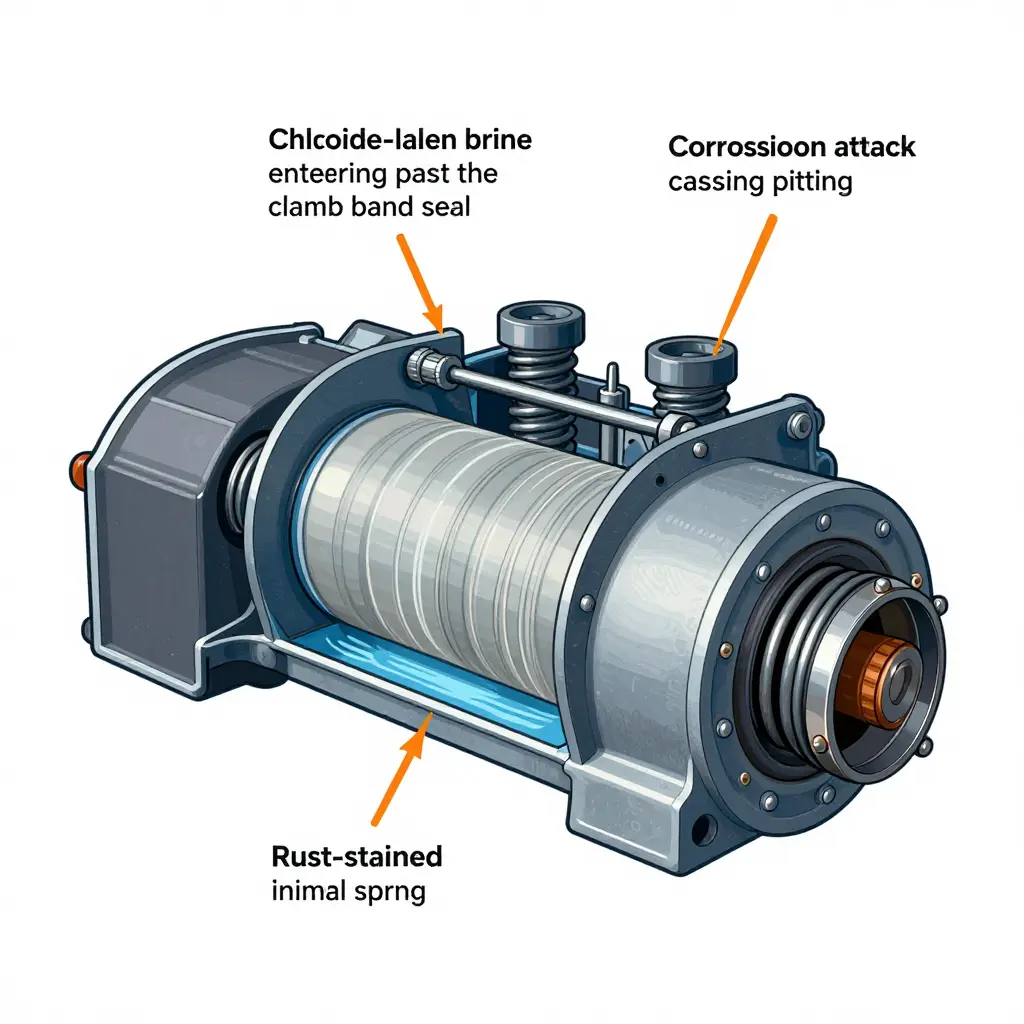
Humidity and steep temperature swings open a second path, from the inside. Compressor discharge is hot and saturated; as it cools through long lines and reservoir walls it drops below the dew point and leaves water and oil emulsion in the tanks, which is then carried downstream on every application. A saturated air dryer cartridge cannot undo that. Once the desiccant is loaded and cold-weather duty has cut the purge cycles short, it passes wet air through instead of drying it, and the chamber gets a dose of moisture with every brake application. In freezing weather the mechanism can stop moving altogether.

Short duty cycles and aggressive washing add to it. Stop-start work never lets the system warm above the condensation threshold, so moisture that gets in stays in, and the dryer gets too few regeneration cycles to shed what it has absorbed. High-pressure washing then drives water past seals and boots that would shrug off rain, and long idle periods leave that water sitting against bare metal for days, long enough for flash rust to become pitting. A corroded chamber found at roadside inspection is a brake defect regardless of how few miles were logged.
This is the argument for scheduling winter brake maintenance by exposure rather than by odometer: check desiccant life, drain reservoirs, look for chloride staining on bands and boots, and replace chambers that are pitting before freeze-thaw turns cosmetic rust into a compliance failure.
Where Winter Brake Violations Actually Come From
The trucks that fail cold-weather inspections are rarely the high-mileage ones. They are the ones whose brake hardware has been eating road salt since November. Brake defects are consistently the largest single category of vehicle out-of-service violations in North American roadside enforcement, and the bulk of them come from adjustment, air loss and chamber condition rather than from friction material at the end of its life.
Most shop routines still put the attention on wear items, but the defects that actually take trucks out of service tend to be environmental: a chamber weeping at the seam, a stroke that has drifted out of adjustment because the pushrod is binding, a fitting rusted through from the inside. If your January visit is built around tread depth and lining thickness, you are inspecting the wrong end of the system. The exact split varies with region, salt policy and fleet mix, so pull your own violation history before you set priorities; it will beat any published average.
The practical move is to reorder the checklist. Chamber condition, pushrod stroke and line integrity are where the violations are, and all three respond to inspection and preventive replacement rather than to distance. A low-mileage heavy-duty dump truck that idles through a salted winter can post a worse brake inspection record than a highway tractor that never leaves the dry lane. Fleets that shift their winter checks toward those categories usually see out-of-service rates fall, because they are finally measuring the things that fail.
Start at the chambers, work outward through the pushrods and air lines, and only then look at friction material and slack adjusters. Then audit the results against your own violation history, since local salt exposure and duty cycle will shift the ranking.
How Roadside and DOT Inspections Evaluate Brake Chamber Condition
A brake chamber gives plenty of warning before it quits. Most of that warning is visual, and most of it appears in winter. An inspector does not need to disassemble anything to reach a verdict.
The Visual Pass: Housing, Clamp Band, and Mounting
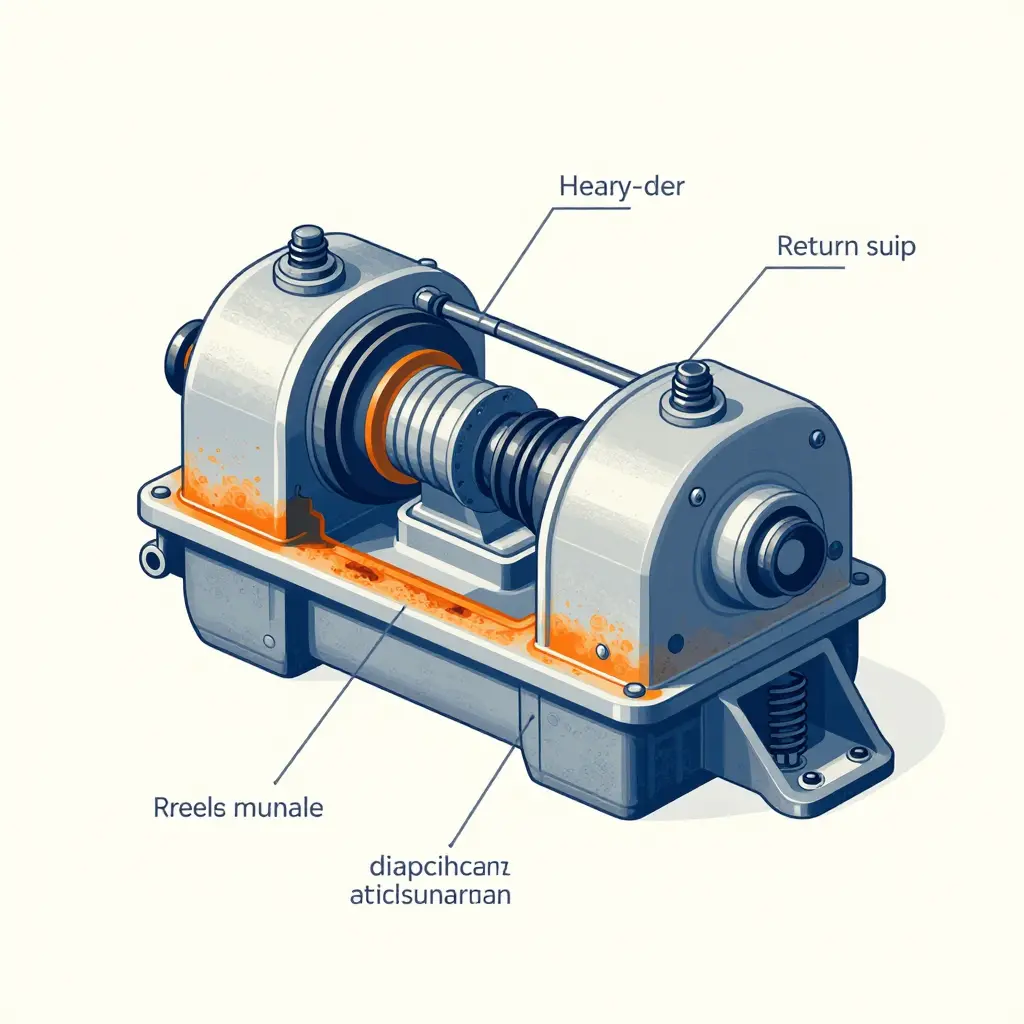
The inspection starts with the housing. Rust scale, pitting and soft metal around the clamp band groove get immediate attention. Corrosion is the most common reason a chamber that passed in spring fails in February: salt and trapped moisture work at the seam where the two halves meet, and the steel thins from the inside. A crack at that seam, a perforation, or a band groove rusted shallow all read as structural failure, not cosmetic wear.
Then the clamp band. It has to sit fully in its groove, be tight, and carry the right bolts. A loose band, a missing bolt or a band sitting off center is a defect on sight. Mounting comes next: bracket bolts, welds, hose routing, chamber angle. A tilted can or a chafed hose counts as a fault.
The Functional Pass: Stroke, Leaks, and Diaphragm
The inspector applies the brakes and measures pushrod stroke with a straightedge against the chamber’s adjustment limit mark. A stroke past the mark means the chamber is not delivering the force the system expects, and the brake is out of adjustment.
Leak detection follows, by ear at full application and then with soap solution. Bubbles at the clamp band, the seam or the hose fittings settle it. Diaphragm integrity is judged indirectly: a pushrod that creeps, a chamber that re-strokes, or a system that will not hold pressure points to a ruptured or perforated diaphragm inside the can, though a leaking valve can produce the same symptom.
What a Failure Means for the Operator
A chamber that fails these checks is a defective brake component, and there is no conditional release: it gets repaired or replaced before the vehicle moves under its own power. That is where roadside inspection failures turn into money.
- Out-of-service order. The vehicle is placed out of service on the spot and the driver does not finish the route.
- Downtime. Hours to days, depending on parts availability and whether a mobile mechanic can reach the unit.
- Repair cost. Chamber and hardware, labor, and the premium for emergency or after-hours service.
- Towing and recovery. A roadside tow, a hook fee, and storage until the shop opens. Fleets that run their own recovery assets, such as dedicated towing and recovery vehicles, shorten this step.
- CSA scoring exposure. Violations carry severity weights and stay on the carrier’s record for a defined period, which shapes how often the fleet gets pulled in for inspection later.
- Dispatch availability. One dead tractor means loads get re-powered, rescheduled, or lost to a competitor.
The cheapest inspection outcome is the one where brake chamber corrosion never develops, because the chamber was inspected, drained and dried before the salt season arrived.
The table below follows the order an inspector actually uses, so you can run the same pass in your own yard.
| Check | What Inspectors Look For | Failure Indicator |
|---|---|---|
| Housing condition | Rust scale, pitting, seam cracks, perforation | Soft or perforated metal, crack at the sealed seam |
| Clamp band | Band seated in groove, tight, correct bolts | Loose band, missing bolt, band off center |
| Mounting security | Bracket bolts, welds, hose routing, chamber angle | Loose chamber, chafed hose, tilted can |
| Pushrod stroke | Measured travel against the chamber’s adjustment limit | Stroke at or beyond the limit mark |
| Air leaks | Audible check, soap solution, system hold | Bubbles at seam or fittings, steady pressure loss |
| Diaphragm integrity | Pushrod creep, re-stroke, hold test | Rod creeps, chamber re-strokes, no pressure hold |
Corrosion Decides the Outcome, Not the Odometer
A truck that logs 8,000 winter miles on treated roads can present worse chambers than one that ran 40,000 miles the previous summer. Brine clings to the housing long after the road dries, chloride stays in the clamp band seam, and every temperature swing pulls moisture out of the air system onto cold steel. None of that appears on an odometer, which is why mileage-based service intervals miss it.
The diagram below maps the failure points on a typical diaphragm chamber. Four of them are unprotected hardware: the band seam, the mounting bracket and bolts, the pushrod boot, and the inlet port.
How Corrosion Turns Into an Out-of-Service Defect
Corrosion rarely stays cosmetic. Pitting on the outside becomes pitting on the inside once moisture gets past a hardened boot. Scale on the clamp band costs clamp load, the diaphragm bead loses its seal, and the chamber either leaks or applies unevenly. Either condition shows up as a stroke outside the limit or as a leak rate that fails the applied-stroke test.
Build the Inspection Around Risk, Then Schedule the Service
Stop treating the chamber as a single item on the list and treat it as a set of checkpoints. Salt exposure needs a wash-and-dry routine. A saturated dryer needs a cartridge, not another drain-and-hope. Rusted clamp hardware needs new parts, because a wire-brushed band will not hold torque through a winter. Fleets on mixed equipment can line chamber work up with the wider chassis schedule covered in these trailer service and maintenance resources, which keeps the brake audit on the same calendar as tires, suspension and body work.
Winter Brake Chamber Risk Map: Factors, Checkpoints, and Actions
This table links each winter corrosion risk to the evidence it leaves on a chamber and to the point where a mechanic can confirm it. It is a shop-floor reference for pre-trip checks, PM inspections and post-trip write-ups on equipment working in salt and freeze-thaw conditions.
| Risk Factor | What Corrosion Looks Like on the Chamber | Inspection Checkpoint | Recommended Service Action |
|---|---|---|---|
| Road-salt and brine exposure | White chloride crust on the housing; pitted coating; rust bleeding from the band seam | Full 360-degree exterior, band seam, and mounting bracket after every wash cycle | Rinse with low-pressure fresh water, dry fully, apply OEM-approved corrosion inhibitor to non-friction surfaces; replace the chamber if pitting has thinned the housing or is deep enough to catch a fingernail |
| Condensation in the air system | Milky emulsion at the inlet port; water droplets or rust film inside the chamber; dark staining at the vent | Daily reservoir drains, inlet fitting, vent, and the lowest point of the system | Drain all reservoirs at end of shift, service the coalescing filter, replace any chamber found with free water, confirm the vent is not ice-blocked |
| Saturated air dryer desiccant | Fine white desiccant dust in the inlet port and valve body; abrasion marks; accelerated pitting | Purge cycle duration, desiccant bed condition, cartridge hours, moisture ejector operation | Replace the desiccant cartridge at the OEM interval or when purge dew point rises; replace the purge valve; re-drain and recheck |
| Clamp band and mounting hardware rust | Orange-brown scale on the band; stretched or seized clamp bolt; rust jacking between band and housing flange | Band torque, bolt thread condition, bracket-to-axle fasteners, gap at the flange joint | Replace corroded bands and bolts rather than reusing them; torque to OEM specification with a calibrated wrench; apply anti-seize only where the OEM permits |
| Diaphragm aging combined with moisture | Swollen, stiffened or cracked rubber; milky deposits on the diaphragm face; separation at the bead plate | Diaphragm and pushrod seal on serviceable chambers, per OEM procedure; pushrod stroke measurement | Replace the diaphragm at the OEM interval or at the first sign of swelling or cracking; dry the chamber interior; re-measure stroke after reassembly |
| Extended idle or parked storage | Rust film on the return spring; pushrod that returns slowly or sticks; brake drag after release | Pre-trip apply and release cycle, pushrod return, vent condition, storage-area humidity | Cycle the brakes and drain the tanks before and after storage; free and lubricate per OEM guidance; replace the chamber if the spring is pitted or the pushrod does not return freely |
| High-pressure washing and steam cleaning | Water ingress past a cracked boot; rust streaks below the pushrod opening; cloudy fluid at the vent | Pushrod boot and breather vent before and after any wash or steam clean | Keep the nozzle a foot or so from the boot and vent, use low pressure, dry with compressed air, and replace torn boots immediately |
The table supports, but does not replace, the manufacturer’s service guidance and the brake adjustment and inspection rules that apply where you operate. Confirm torque values, replacement intervals and disassembly procedures against the current OEM service manual for the specific chamber part number before work begins.
Building a Winter Brake Chamber Corrosion Prevention and Maintenance Program
Corrosion is slow and quiet, which is how it beats fleets at inspection time: a chamber can look serviceable from the cab and still be failing inside after eight weeks of brine. The fix is not more frequent guessing. It is a written program in which every task either removes moisture or detects degradation early.
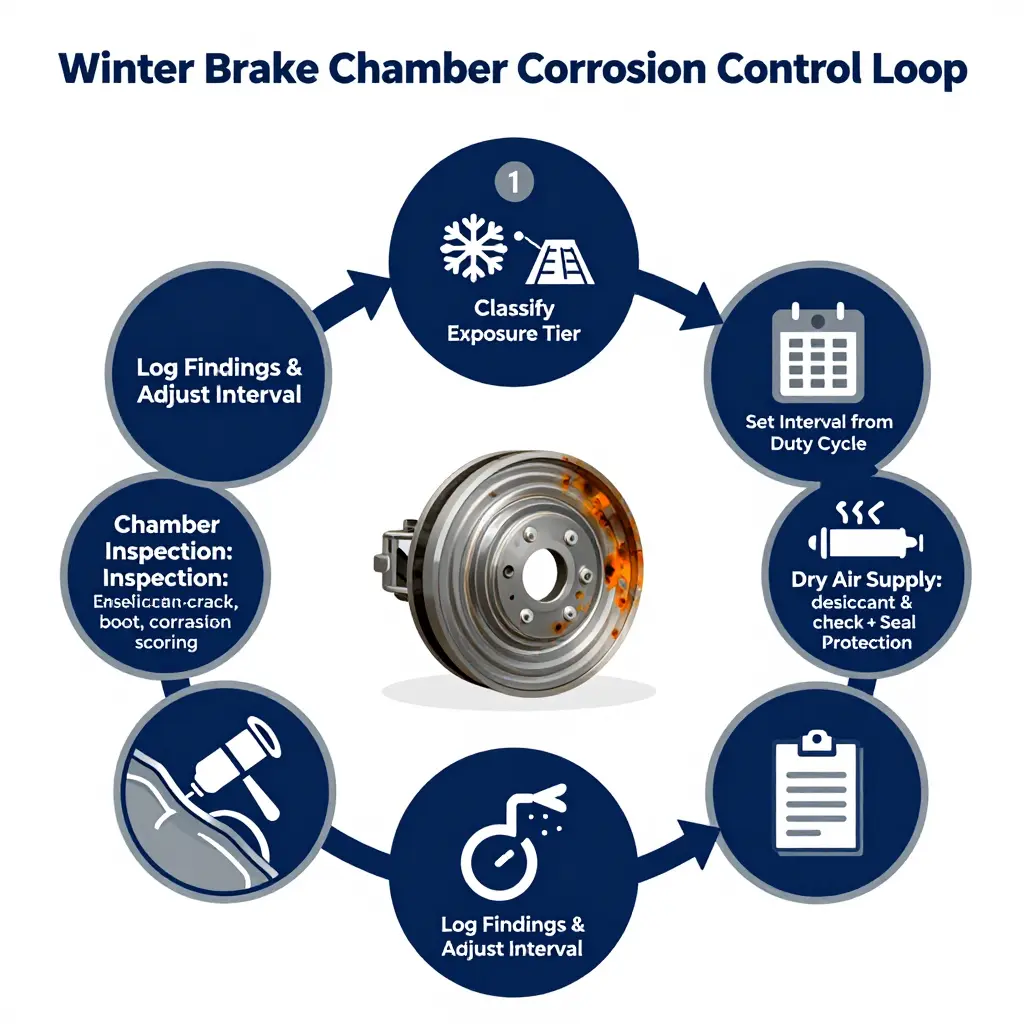
Control 1: Set Intervals from Exposure and Duty Cycle, Not Odometer Alone
Mileage tells you how much the brakes worked. It tells you nothing about how much saltwater they inhaled. A plow truck running 90 miles a day behind a brine spreader accumulates corrosion faster than a line-haul tractor covering 500 miles on dry interstate. Tier each unit by exposure and let mileage act as a secondary trigger. Re-tier a truck when its route changes, not when the year ends.
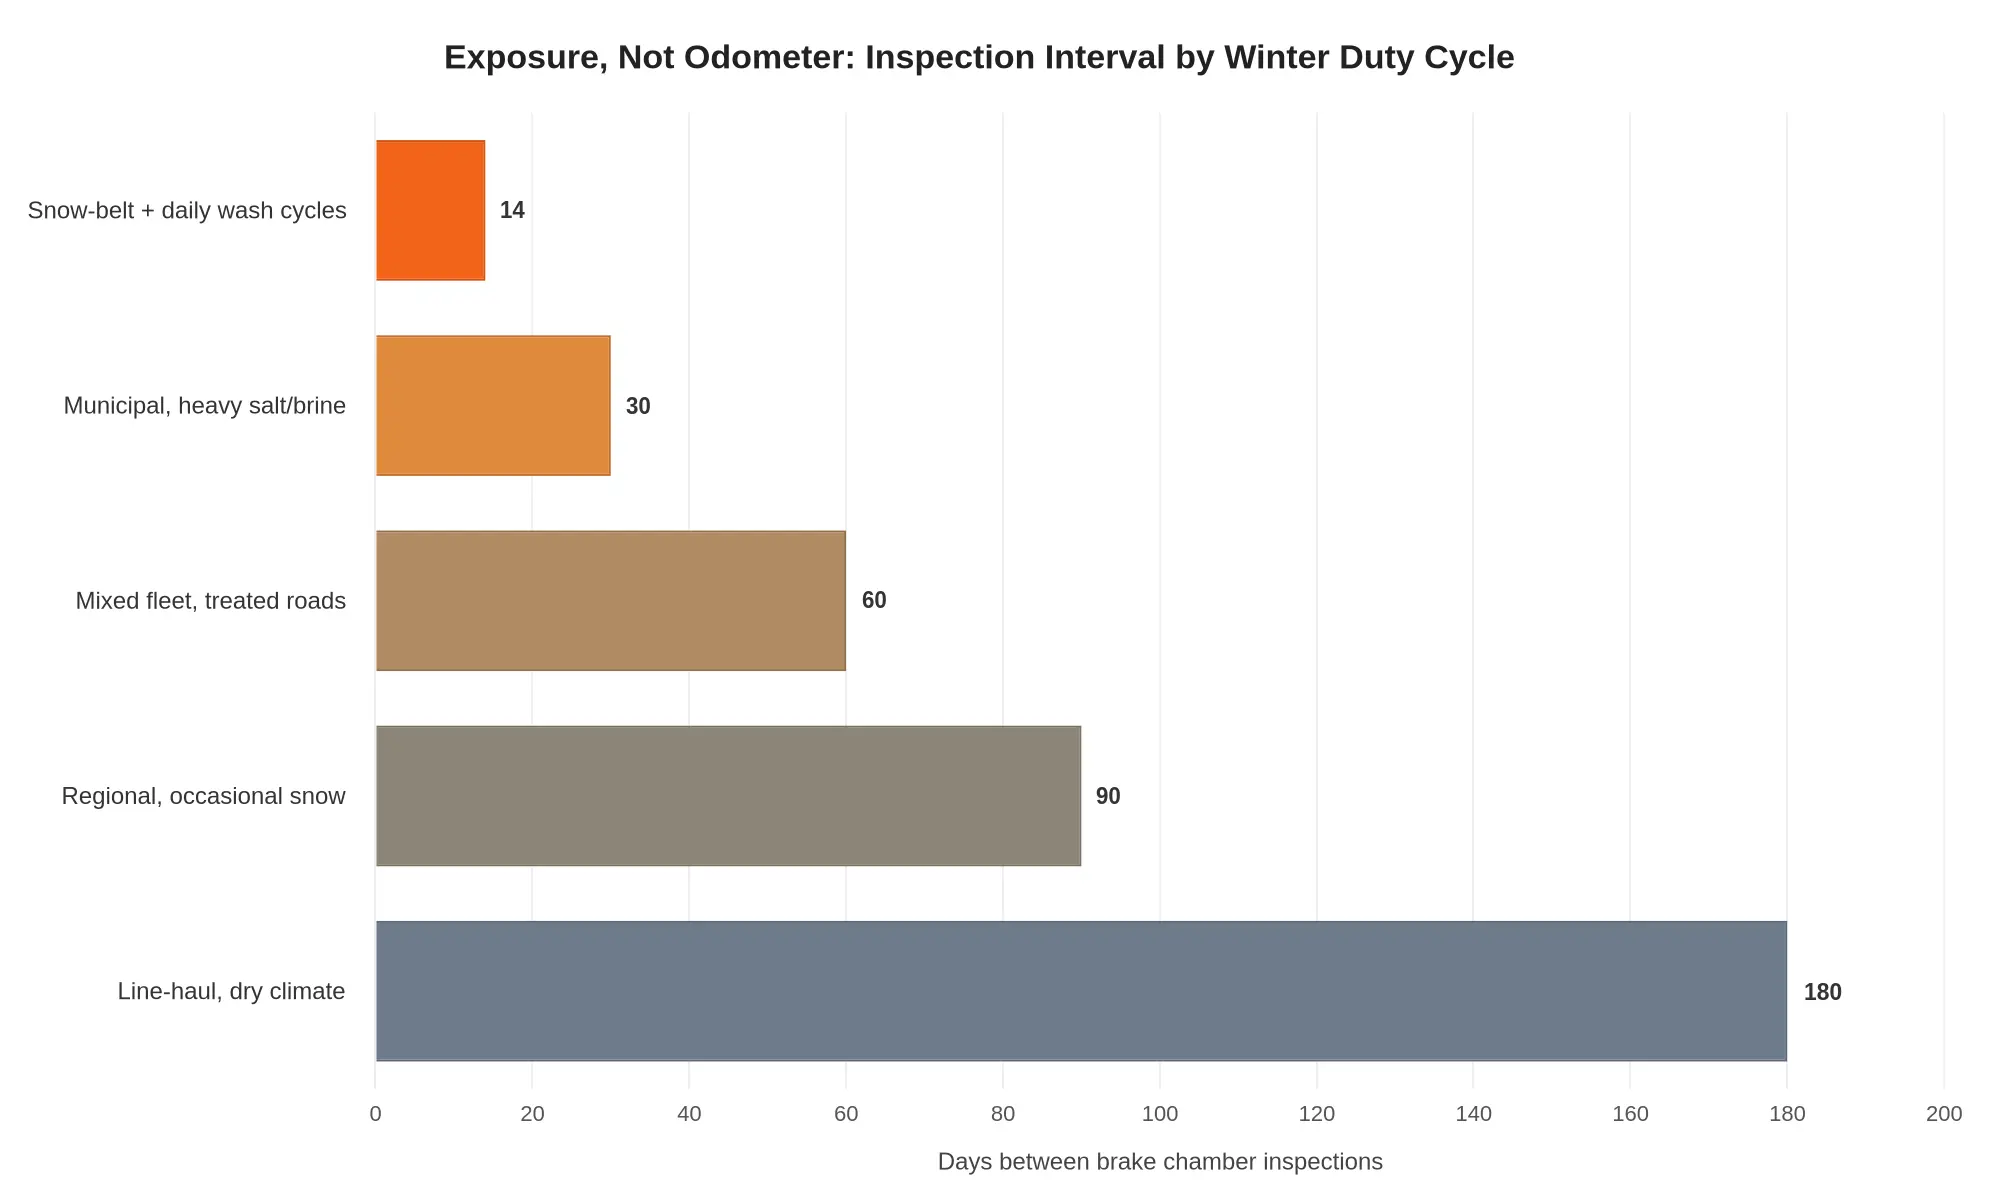
A workable starting point: 180 days for dry-climate line-haul, 90 days for occasional snow, 60 days for mixed fleets on treated roads, 30 days for heavy salt and brine duty, and 14 days for snow-belt units washed daily. Adjust with what your inspection records show, which is the point of keeping them.
Control 2: Treat the Air Dryer Desiccant as a Consumable
Most chamber failures start upstream. Saturated desiccant pushes wet air into the tanks, the lines and eventually the chamber cavity, where it condenses against cold steel overnight. Plenty of air brake system maintenance programs still change cartridges on mileage, which in a hard winter is usually too late. Put the cartridge on a seasonal clock instead, pre-winter, mid-winter and post-winter, and check for fines carryover, oil contamination and a purge valve that no longer snaps clean.
If the desiccant is spent, the chamber is just where the water finally lands. Fix the dryer first or you will be replacing chambers all season.
Control 3: Drain Air Tanks on a Fixed Rhythm, Not When Someone Remembers
Manual tank drains are the cheapest moisture control in the system and the most neglected. Put drain-and-dry on the same checklist as fueling, give each exposure tier a defined interval, and require the drain to run clear before the plug goes back in. A tank that produces a steady stream of water at every drain is telling you the dryer is failing, so log it as a defect.
Automatic drains need checking too. Confirm they cycle in freezing weather, because ice in the drain body turns an automatic system into a sealed container holding water.
Control 4: Dry Down After Every Wash and Protect the Seals
Wash bays are where winter brake maintenance gets undone. High-pressure spray drives water past the chamber boot, and a truck parked wet at 20°F turns that water into an ice ring that works the diaphragm and seal on every stroke. Add a mandatory dry-down: blow out the chamber exterior and clamp band area, cycle the brakes a few times, and confirm the boot is seated and undamaged.
A light coat of brake-safe protective coating on the band and housing exterior slows surface attack without reaching the diaphragm. Keep general-purpose grease and solvent away from the boot, which will swell and crack.
Control 5: Replace on Corrosion Severity, Not Pushrod Stroke Alone
Stroke adjustment is a symptom check, not a corrosion check. A chamber can pass a stroke test and still be one hard stop away from a diaphragm rupture, because pitting eats the housing from the inside out. Inspect boot integrity, water ingress, band rust-through and pitting along the seam, then apply fixed criteria so every technician makes the same call.
| Condition Observed | Severity | Action |
|---|---|---|
| Light surface rust on clamp band only | 1 | Clean, protect, recheck in 30 days |
| Boot cracked, missing, or unseated | 2 | Replace boot; replace chamber if water found inside |
| Rust staining or fluid weeping at seam | 3 | Replace chamber at current service |
| Pitting or scaling on housing near clamp ring | 3 | Replace chamber; do not adjust stroke |
| Seized return spring or corroded pushrod plate | 4 | Replace chamber immediately, out of service |
Write the table into the shop standard. It turns a judgment call into a decision rule, which is what keeps inspection outcomes consistent across drivers, shifts and locations.
Control 6: Keep Records That Prove the Program Is Working
A corrosion program without records is a set of good intentions. Log every inspection with date, unit number, exposure tier, findings by severity and the corrective action taken. Two seasons of that data will show which intervals are too long, which routes are destroying chambers and which wash practices are helping.
Records also do something practical at roadside: they put a maintenance history in front of an inspector instead of a story.
Where the Program Meets the Iron
A program only performs as well as the equipment it was written around. If your winter fleet includes commercial vehicle platforms set up for regional cargo work, check that chamber access, drain routing and dryer service points work for a technician in gloves and wet weather. The best interval in the world fails if the job takes forty minutes.
The same applies across municipal fleet equipment, where plow and spreader duty produces the harshest exposure tier on that chart. Put those units in the 14-to-30-day band from the start, and John trucks winter maintenance stops being a reaction to failures and becomes a schedule you can staff, budget and defend.
Winter Brake Chamber Corrosion: Frequently Asked Questions
These are the questions that come up most often when John trucks winter maintenance checks run into a bad January, answered the way we would answer them in the shop.
Does low winter mileage make brake chamber inspections unnecessary?
No. Corrosion advances on exposure time and moisture contact, not on miles, so a truck that shuttles between short salted-road runs and long parking periods is often worse off than one that keeps moving. Sitting idle lets condensation settle against the diaphragm seat and leaves the salt film wet on the housing, and rust keeps progressing while the odometer barely moves.
How often should brake chambers be inspected in winter?
Treat inspection as a calendar item during salt season: a visual pass over housings, bands and vents at every pre-trip, plus a measured stroke and leak check at each scheduled service. Shorten the cadence for vehicles on brine routes or parked outdoors, including the severe-duty dump truck configurations that spend their winters in spray and slush. A chamber showing fresh rust bleed, band swelling or a vent that no longer breathes freely should come off for a closer look rather than wait for the next interval.
Is surface rust alone enough to justify replacing a chamber?
Not on its own. Light, dry, uniform discoloration on the outside of a housing is largely cosmetic: clean it and keep watching. Rust that is flaking or powdery, a band seam that has swelled, or a rust-colored stain trailing from the pushrod opening means corrosion has reached the inside, and at that point the chamber gets replaced as a complete assembly, since sealed and crimped housings are not meant to be opened and cleaned.
How do I tell corrosion damage apart from normal wear?
Normal wear is smooth and predictable: light polishing where the diaphragm contacts, even witness marks at the pushrod seal, and a gradual stroke change that answers to a slack adjustment. Corrosion is irregular and localized: pitting, scale trapped under the clamp band, a seam that weeps, rubber that has hardened and cracked. If stroke has grown without any slack adjustment, suspect internal corrosion before you assume normal seating.
Do air dryers alone prevent brake chamber corrosion?
No. A dryer controls moisture arriving from the compressor, and only while its desiccant, heater and purge valve are healthy; a saturated cartridge passes water straight through to the tanks and chambers. It has no effect on external salt spray working at the housing, band and vent, and moisture still enters through the chamber’s own vent as it breathes on every apply-and-release. Service the dryer and drain the tanks on schedule, and keep inspecting the chambers.
What should I do if I find corrosion during a pre-trip check?
Do not dispatch the vehicle. A corroded chamber that has lost effective diaphragm area or releases slowly can cause brake drag, uneven application, or a stroke that fails measurement at a DOT inspection, so tag the unit, record the finding, and replace the chamber rather than adjusting around the symptom. After replacement, confirm the new stroke, re-check the slack adjuster, and verify the dryer and tank drains are working, so the replacement does not start the same decline.
Tying Corrosion Control to Inspection Readiness
On a truck in winter service, the variable that most reliably decides whether it clears a roadside inspection is not accumulated mileage. It is how much moisture and chloride the chambers have absorbed, how the truck is driven, and whether anyone drains the tanks. All three sit within an operator’s control. That is what makes the distinction worth keeping: it turns a compliance risk that looks unpredictable into a scheduled maintenance item.
The mechanism
Chloride-laden water works past the pushrod seal and breather, then sits against the internal spring and diaphragm. Short winter runs rarely warm the housing enough to drive that condensate off, so it stays and starts working. Scale pits the bore, the return spring loses tension, and the diaphragm either ruptures or develops a leak that stays invisible until the system is pressurized and held.
The inspection consequence
A compromised chamber shows itself in ways an inspector reads quickly: a slow pressure drop during the leak test, a spring brake that will not hold or release cleanly, a slack adjuster that cannot be brought back into adjustment. None of that depends on distance traveled. A low-mileage truck on salted urban routes can present worse than a high-mileage unit that gets drained and inspected on schedule.
The prevention control
Because the failure is moisture-driven, the countermeasure is procedural rather than expensive. Daily wet-tank drains, dryer cartridges changed on condition rather than optimism, boot and band inspection, and diaphragm replacement ahead of the cold season all break the cycle before it reaches the leak test. Fleets running mixed equipment also need a supplier who can keep chambers and diaphragms in stock, so a replacement never sits waiting on a January backorder.
Put John trucks winter maintenance on the calendar, so chamber inspections happen before the first hard freeze and the first salt spread, not after a roadside failure has already taken the truck out of service. Corrosion control done on schedule is inspection readiness by another name.