

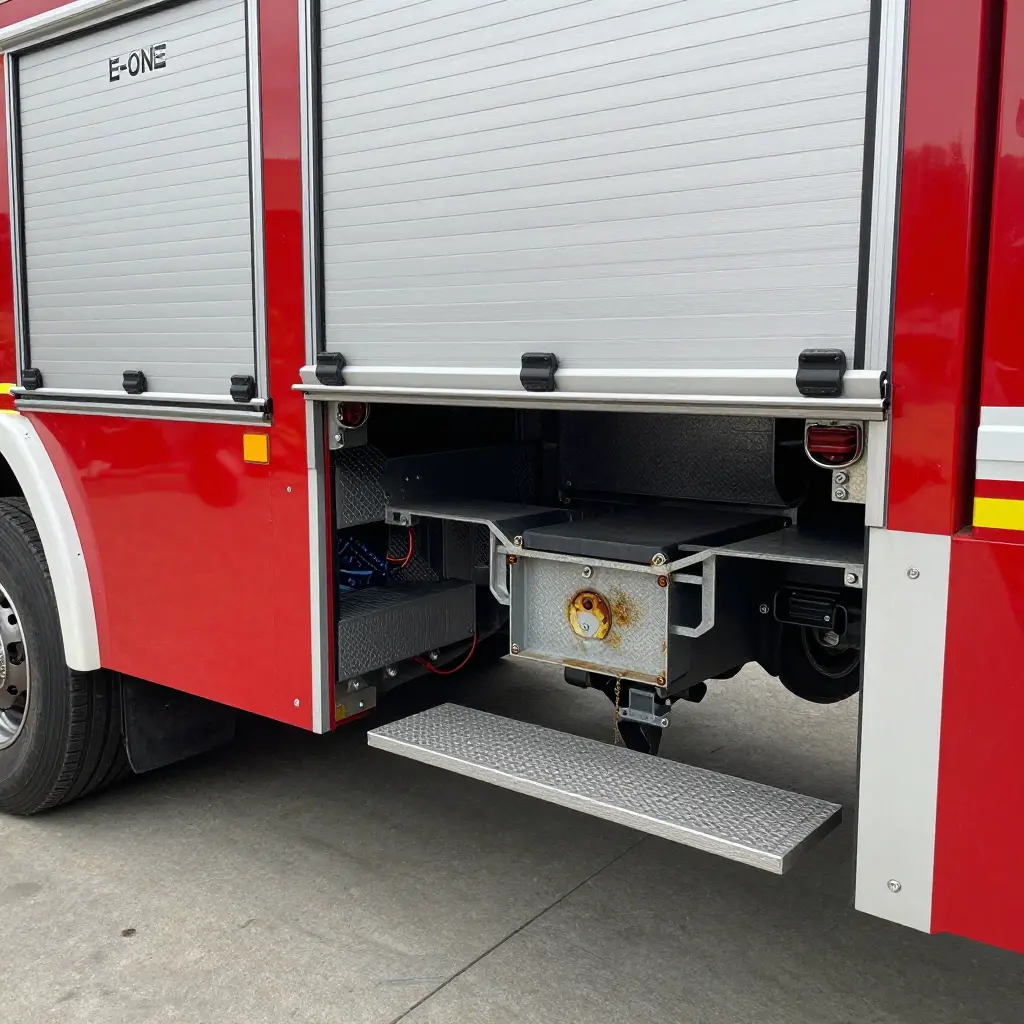
Most used fire truck buyers miss corrosion where the aluminum body meets the steel subframe, and that joint often decides whether a used E-One is worth buying. E-One builds cabs and bodies from aluminum alloy panels and extrusions and mounts them to carbon-steel or galvanized subframes. At each junction – body mount brackets, compartment floor rails, pump house sills, outrigger pads – trapped moisture and road de-icing salts close a galvanic cell. The aluminum acts as the sacrificial anode and loses material, usually from the inside out.
Corrosion rarely announces itself on a used E-One, so a buyer needs a repeatable sequence: find where the joints fail first, read the aluminum oxide bloom and pitting depth, check the steel side for rust jacking, and verify before purchase. The same sequence works for one rig or a full fleet, for a department or a municipal buyer.
Aluminum and steel sit at different points on the galvanic series, which makes the joint between an aluminum body and a steel subframe a battery waiting for an electrolyte. A film of moisture is enough. Aluminum becomes the anode, steel the cathode, and oxidation at the aluminum surface releases aluminum ions and electrons. The electrons cross the metal contact to the steel, where reduction reactions consume them. The net effect converts solid aluminum into soluble corrosion products. That shows up as pitting and blistering and, eventually, lost metal directly beneath or beside the fastener line.
Moisture drives the reaction, and road salt accelerates it. Salt raises the electrolyte’s conductivity and chloride concentration, breaking down the passive oxide layer that normally protects aluminum; chloride ions penetrate that film and keep the attack localized. The primary defense is dielectric separation – insulating washers, gaskets, coatings, or sealants between the two metals – because it interrupts the electron path. Let that barrier fail, degrade, or get omitted during a repair, and dissimilar metal corrosion at steel subframe joints runs unchecked. Area ratio matters too: the larger the steel cathode relative to the aluminum anode, the faster the aluminum corrodes, so a small aluminum contact against a large steel subframe concentrates material loss.
Factors that accelerate joint corrosion:
- Electrolyte persistence: standing moisture, road spray, or wash-down water held in crevices.
- Chloride exposure: de-icing salts, brine, and coastal air raising electrolyte conductivity.
- High cathode-to-anode ratio: large steel areas driving small aluminum anodes.
- Compromised dielectric separation: missing, worn, or painted-over insulating barriers.
- Dissimilar fastener materials: steel bolts or washers in direct aluminum contact.
- Coating damage: scratched paint or failed sealant exposing bare metal.
- Thermal and vibration cycling: stress that fatigues the oxide layer and opens the joint.
On municipal emergency vehicles, treat white aluminum corrosion product, paint lifting, and fasteners that no longer hold torque as signs that aluminum body corrosion is active at the joint. The joint needs to come apart for a closer look.
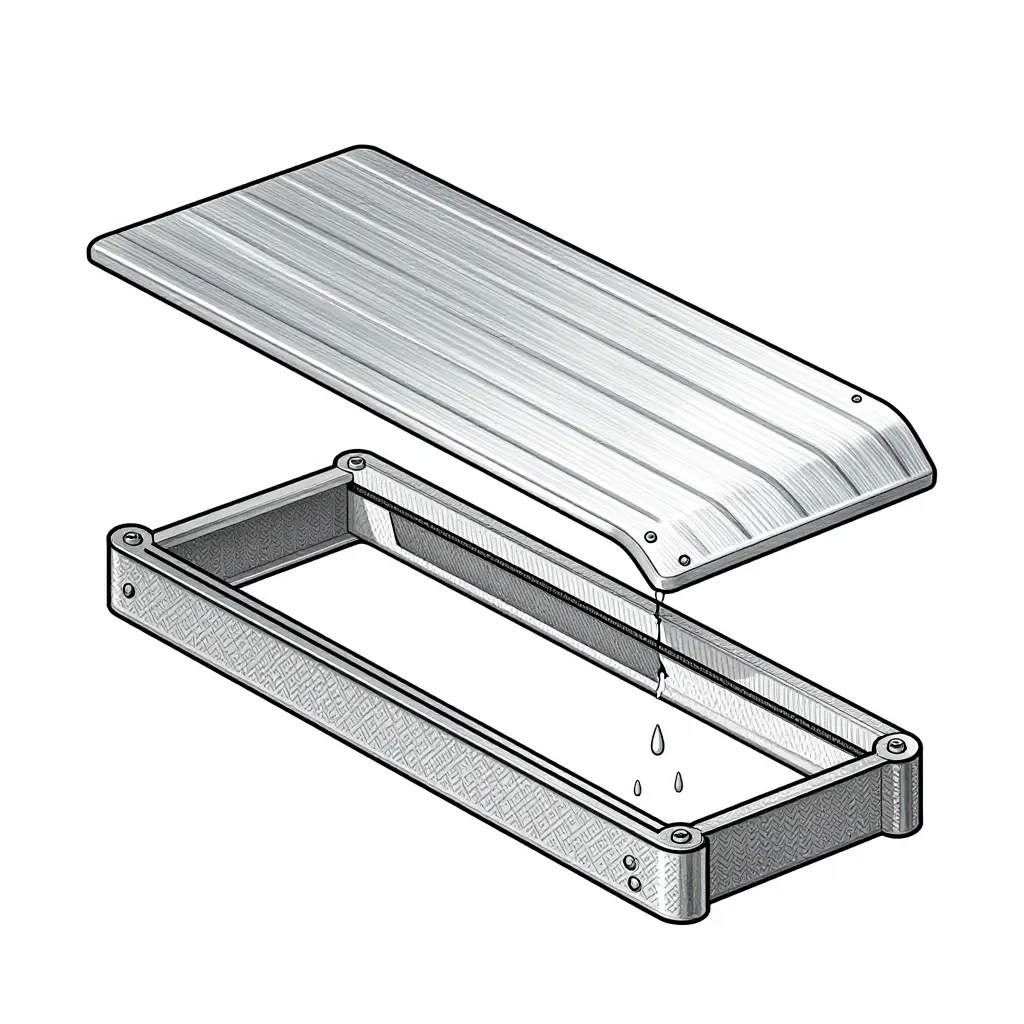
Cross-section schematic of an aluminum body panel bolted to a steel subframe. Note how the insulation layer separates the two dissimilar metals, how moisture travels down the fastener into the crevice, and where galvanic corrosion begins to bloom around the contact interface.
Where to Inspect Aluminum Body Corrosion at Steel Subframe Joints
Even a spotless used E-One fire truck for sale can hide advancing subframe joint corrosion beneath its aluminum skin. Because E-One pairs aluminum bodies with steel subframes, every interface between the two metals is a potential corrosion cell. Road salt, standing water, and repeated wash-downs collect in these pockets and stay there. Focus on five zones.
Cab-to-Body Mounts
The isolation mounts between the cab and body trap grit and brine. Check both sides of each bracket for white aluminum oxide powder and brown steel staining around the bolts.
Pump Module Attachments
Pump modules bolt to steel rails that catch drips from the pump, drains, and primer lines. Constant moisture plus winter road salt speeds subframe joint corrosion at every fastener.
Compartment Floor Supports
Floor supports sit low and flat, so they act like shallow trays. Water wicks under the diamond plate and pools against the steel stringers, eating the aluminum above them.
Outrigger Connection Points
Outriggers carry heavy loads and flex in use, opening small gaps that let salinity-laden spray in. Look for cracked paint, bubbling coating, and rust streaks around the mounting plates.
Rear Body-to-Frame Interfaces
The rear interface catches whatever the tires throw up. Mud and salt pack into the gap and hold moisture against bare metal for years.
Bring a bright light, a mirror, and an awl for probing soft spots. Catching subframe joint corrosion early protects your budget, and on load-bearing joints it protects your crew. If your department also manages broader municipal fleet vehicles, our inventory is worth a look.
Comparative Table of Corrosion Severity Indicators
Corrosion on an E-One chassis does not spread evenly; it concentrates at the steel-to-aluminum subframe joints where galvanic activity thrives. The table maps each critical inspection point to its telltale visual indicator, potential structural impact, and recommended action. Use it as a quick-reference scan sheet when evaluating used E-One fire trucks, and pair it with municipal apparatus listings when you start comparing overall fleet condition.
| Inspection Point | Typical Visual Indicator | Potential Structural Impact | Recommended Action |
|---|---|---|---|
| Cab mounts | White powdery aluminum oxide bloom, bubbling paint, rust weeping from mounting bolts | Loosened cab, cracked mounting brackets, cab shift and door misalignment under load | Probe joints with a pick, verify fastener torque, clean and re-treat the joint, replace isolated fasteners |
| Pump module joints | Rust streaks between steel and aluminum mating faces, flaking undercoating, dark vertical staining | Pump misalignment, drivetrain vibration, loss of torsional rigidity between body and frame | Clean and neutralize mating surfaces, apply corrosion inhibitor, re-torque all fasteners to spec |
| Compartment supports | Bubble rust along support seams, swollen paint, whitish deposits beneath bracket feet | Sagging compartments, door misalignment, standing water intrusion and progressive metal loss | Strip and neutralize affected areas, reseal joints, monitor annually for renewed oxide build-up |
| Outrigger connections | Rust blooms at base plates, cracked weld toes, flaking around gussets | Outrigger instability, load-bearing failure, direct operational and crew safety risk | Perform non-destructive weld inspection, repair to manufacturer standard, replace any compromised plate |
| Rear frame interfaces | Rust jacking forcing aluminum apart, white corrosion trails, elongated bolt holes | Frame flex, hairline cracking, impaired tailboard and towing operation | Disassemble the joint, clean and inspect, install isolation washers, re-torque to exact specification |
| Battery box and step mounts | Localized pitting, powder residue under bolts, paint lifting at contact points | Fastener loosening, mounting bracket fatigue, electrical grounding degradation | Refresh the joint with a barrier compound, replace pitted fasteners, confirm grounding continuity |
Rank urgency by combining two readings from each row: how visible the indicator is and how load-critical the joint is. Rust jacking at an outrigger or rear frame interface outranks a faint powder bloom at a battery box, even though both start the same way. If a probe lifts paint, treat the joint as a repair item, not a cosmetic one.
Detection Tools and Inspection Techniques for Steel Subframe Joints
On an aging E-One, the aluminum-to-steel couple keeps working as a corrosion cell. A flashlight alone will not find it; you need several tools layered so hidden defects surface before money changes hands.
Start with your eyes, looking for white or gray aluminum oxide bloom, bubbling paint, and rust streaks weeping from steel subframe joints. Tap with a light hammer: a dull thud where the metal once rang means subsurface corrosion. An ultrasonic thickness gauge measures remaining wall thickness without disassembly, and a pin-type or capacitance moisture meter finds trapped water behind the body rub rails. A rigid borescope reaches into enclosed rail pockets and outrigger mounts to show internal pitting an external camera cannot. Cross-hatch or pull-off adhesion tests tell you whether the paint is still bonded or already lifting off the substrate.
Follow this sequence during any used fire truck buying guide evaluation:
- Record the E-One serial number, build year, and mileage, then photograph all four subframe-to-body mount rows before touching the truck.
- Steam-clean and degrease every accessible joint to remove road film that masks early corrosion.
- Scan systematically for oxide bloom, rust weeping, and cracked seam sealant.
- Tap each steel subframe joint and mount bracket, marking dull-sounding zones with chalk.
- Measure wall thickness with an ultrasonic gauge at every flagged zone and compare against OEM minimums.
- Sweep suspect cavities with a moisture meter to detect trapped water.
- Insert a borescope into rail pockets, outrigger housings, and cross-member interiors to confirm internal pitting.
- Run cross-hatch or pull-off adhesion tests on surrounding coatings.
- Compile a written defect map with photos and repair estimates before negotiating price.
Repair Costs, Resale Impact, and Evaluation Framework
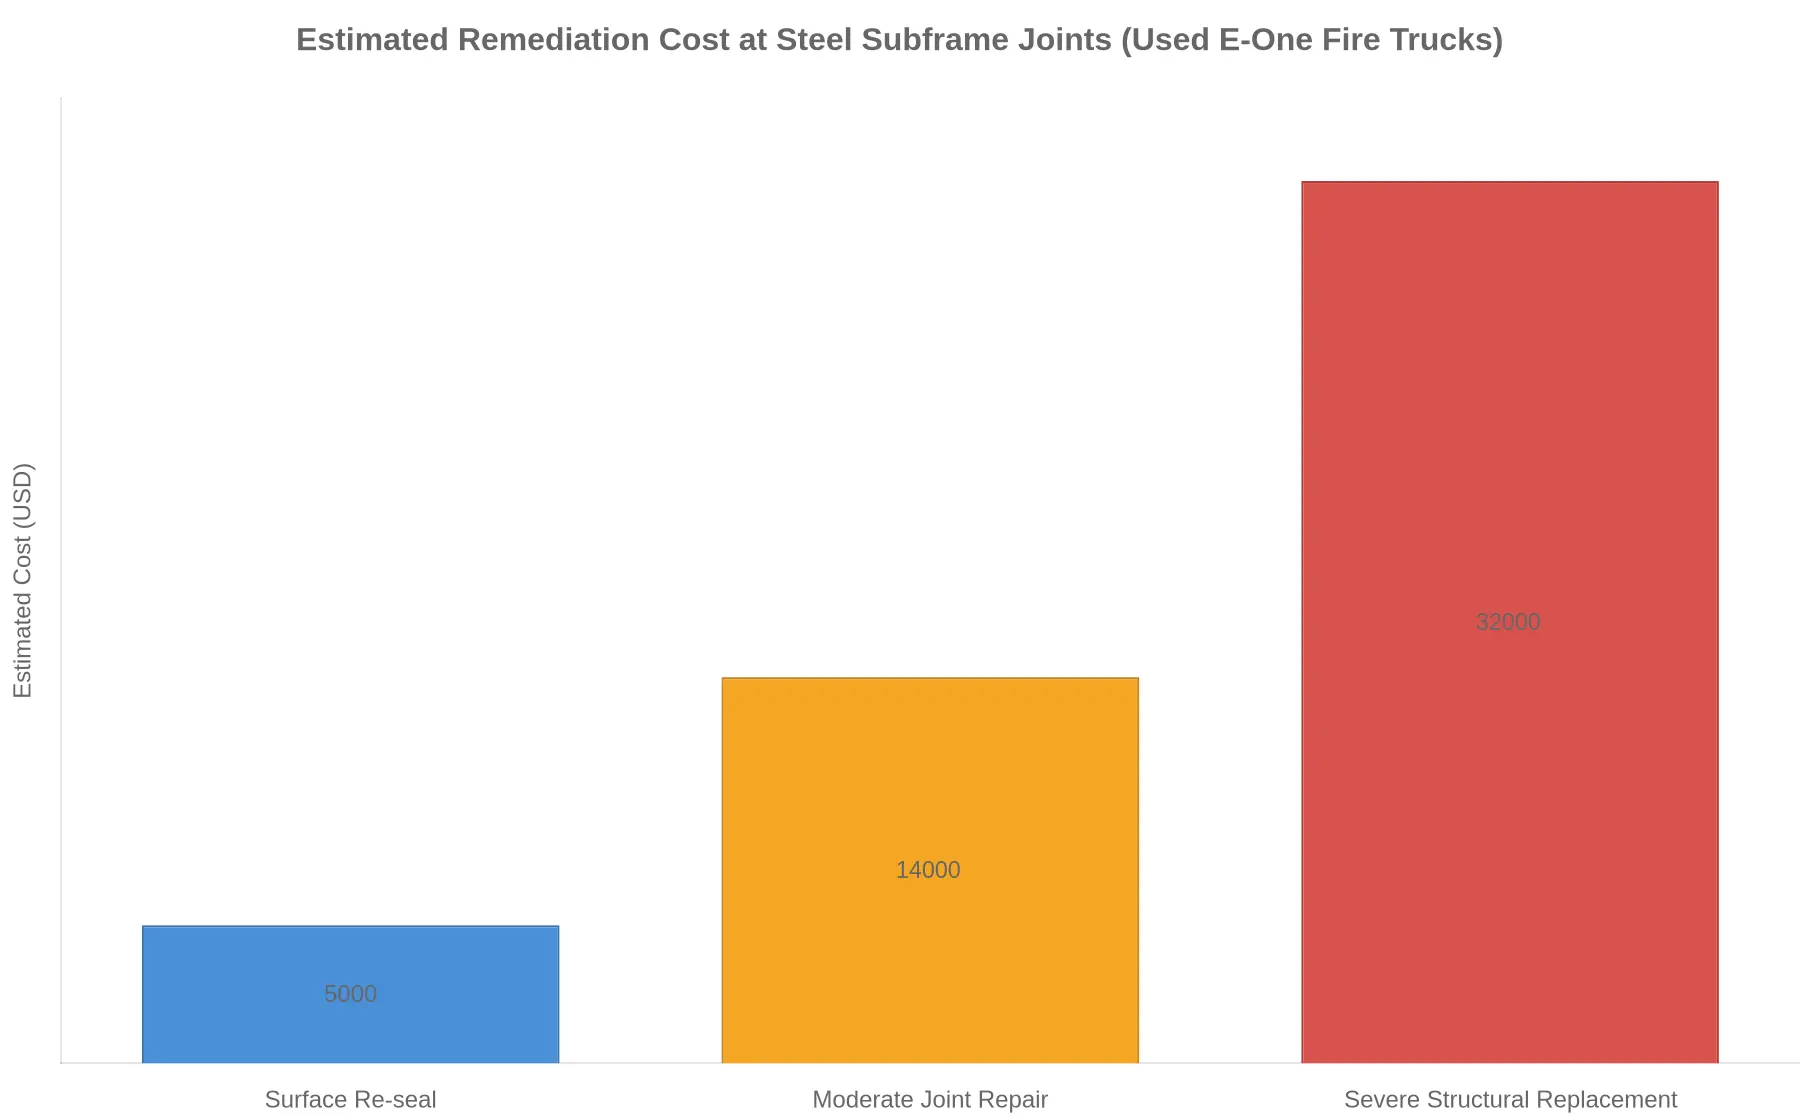
Corrosion at aluminum-to-steel subframe joints does not stabilize – it accelerates. Remediation costs scale directly with penetration depth. Surface treatment and re-sealing may cost a few thousand dollars per affected joint, while replacing compromised steel subframe members, installing isolation barriers, and refinishing aluminum panels can run $20,000 to $40,000 or more per apparatus. Because E-One assemblies vary by model year and body configuration, ask for joint-specific estimates rather than a generic cost range.
Structural integrity is the deeper concern. Degraded joints transfer load unpredictably across the body-chassis interface, which complicates any professional fire apparatus inspection and can jeopardize future certification. Resale value absorbs the rest of the damage. Documented corrosion routinely discounts asking prices on used E-One fire trucks for sale by 15 to 30 percent, and concealed corrosion uncovered during buyer evaluation erases negotiating leverage entirely. Operational downtime is the quiet expense – off-road remediation can idle a rig for weeks, forcing mutual-aid coverage or equipment rental.
Compare candidates on the same five factors:
| Factor | What to Verify |
|---|---|
| Documentation | Joint-level inspection and repair records |
| Severity | Classify as surface, moderate, or structural |
| Cost | Obtain written remediation quotes |
| Value | Compare quotes against resale discount |
| Downtime | Estimate weeks out of service |
Frequently Asked Questions: Aluminum Body Corrosion at Steel Subframe Joints
How can I tell routine surface oxidation from structural corrosion?
Surface oxidation is a thin, chalky white or gray film that wipes away and leaves sound metal beneath. Structural corrosion looks different: pitting, blistering, flaking, and a reddish-brown galvanic stain where the aluminum meets steel. Probe gently. If an awl sinks in, or you see delamination and swelling around rivets, the joint has lost load-bearing integrity and needs attention now.
How often should aluminum body corrosion be inspected at steel subframe joints?
Inspect at least twice a year, and always before purchase. Focus on the highest-risk zones: chassis-to-body mounts, pump panel brackets, and outrigger pads. Any truck stored outdoors or exposed to de-icing chemicals should be checked quarterly. A trained technician with a moisture meter and borescope will find damage hidden behind exterior cladding far earlier than a visual walk-around.
Does corrosion worsen in cold climates with road salt?
Yes, significantly. Chloride-based road salt accelerates galvanic corrosion because it keeps the aluminum-steel junction wet and conductive for longer. Freeze-thaw cycles open crevices and hold brine where it cannot dry. Trucks from northern municipalities often show advanced joint corrosion by year five, while identical apparatus in dry, warm regions may stay clean for a decade.
Is remediation worth the cost?
It depends on how deep the damage goes. Cleaning, sealing, and applying a dielectric barrier is inexpensive and worthwhile when corrosion is caught early. Once structural members are compromised, repair costs can rival a large share of the truck’s value. Weigh documented repair pricing against replacement for used E-One fire trucks for sale, and budget for the worst case.
What documentation should a seller provide?
Request the complete inspection log, repair invoices, and any corrosion-related service records. A credible listing should include undercarriage photos, a moisture and ultrasonic thickness report, and disclosure of prior remediation. Ask for the original build sheet and a written condition statement. With that paperwork, aluminum body corrosion at steel subframe joints becomes a manageable, predictable risk rather than a surprise. Buyers comparing municipal apparatus can also browse our municipal category to see how thorough listings document these details.